Mitzvah Montage
Relive your child’s lifetime memories with a Mitzvah Montage. Photographs and videos of the Mitzvah child with his/her family and friends will be creatively combined with a personalized soundtrack.
Select funny and unique images that will keep you and your audience engaged, smiling, laughing, tearing, singing, clapping, or shouting “oohs” and “aahs.”
Scroll down for some instructions to help you find and organize the best content to be shared in your child’s montage.

Check out some recent Mitzvah Montages here:
Finding and Organizing the Best Pictures and Videos
Please provide up to 120 photos and up to 3 short video clips. Choose content that represents the Mitzvah child’s life, including all those big milestones, activities, interests, talents, family, and friends. Remember to smile and enjoy the memories as you look through all these pictures (it’s OK to cry a little, too).
Know and include your audience. Review your guest list and decide how many times you want to include certain family members and friends, then check them off after adding them. Use various photos with different people and backgrounds to keep your audience engaged. Your guests want to see themselves on the big screen, so when in doubt, include a group shot instead of 2 people in a photo. But don’t add too many pictures of the same crew-just choose your favorites.
Video clips bring the montage to life and help capture your child’s personality, and your high-resolution logo can be included in multiple parts of the montage.
Music. Choose upbeat, happy songs to keep everyone engaged, or let me make the soundtrack.
On a Mac, it’s easy to organize in iPhoto. If you have a PC, use Picassa or Windows Live.
1. Put your pictures into an album called “[Mitzvah Child]’s Montage ALL”. Do this fast, and don’t overthink. Yes, it could contain hundreds, maybe thousands of images. (If you have a younger child, you can create their initial folder now, too – you’ll thank yourself in the future!)
2. Duplicate the album and name it “[Mitzvah Child]’s Montage FINAL.”
3. Narrow down the “[Mitzvah Child]’s Montage FINAL” album by deleting pictures until you get 200-300. Yes, this is the challenging part! Choose quality pictures. Make sure photos are clear without any blur and are in focus. If you open your photo as a full-screen image on your computer and it’s blurry, it will be pixelated in the montage, so find or scan a higher-quality version. Horizontal photos appear more prominent on the screen than vertical photos with blank spaces on the side. Is anyone blinking or not looking at the camera? Are they doing something fun, interesting, or funny? If there are photos that feel similar, pick your favorite and get rid of the others. Make sure that your partner and/or child likes these photos. Don’t add any pictures that are too embarrassing.
4. Step away from organizing your montage pictures for a couple days.
5. With a fresh set of eyes, eliminate pictures until you reach 100-120. This can be brutally hard. You know what happened before, during, and after each shot. Make sure that we, as your guests, quickly understand why that photo best represents your child. If you forgot someone or want to re-add a picture, find it in “[Mitzvah Child]’s Montage ALL.” If you have more than 120 photos or too many video clips, your guests will get bored because the montage is too long.
6. How should you organize your photos? Chronologically, by category, or randomly? It’s all up to you: there’s no right or wrong. Some popular categories are baby, immediate family, siblings, grandparents, extended family, family friends, sports, hobbies, friends, camp, travel, Mitzvah child solo, and recent. If you arrange into sections, some photos won’t fit in don’t fit with the flow so remove them.
7. Please rename each digital file as “your last name–#” or label by category and number (baby-01, baby-02, baby-03, immfam-01, immfam-02, immfam-03, sports-01, sports-02, etc.). (This can be automatically done in iPhoto. Select all the photos in the album, then click File -> Export -> # Photos. Then, under “File Naming,” click File Name -> Album Name With Number. Click Export.) The file names are all renamed in the correct order. If you have already labeled the content and want to move a photo or video, rename it with a letter instead of renumbering all files.
Potential Additional Fees
RUSH MONTAGE
Receive content under 1 month from event.
$200
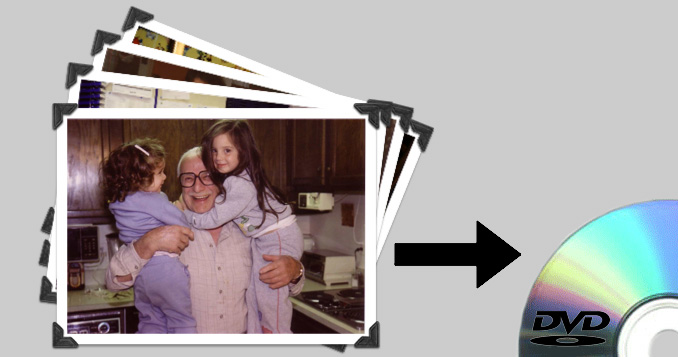
DIGITIZING CONTENT
Converting print to jpg or VHS/DVD to mp4.
$1/pic and $25/clip
ADDITIONAL CONTENT
More than 120 pictures and/or more than 3 videos.
$2/pic and $25/clip
EDITING
Unlabeled, unorganized content; last minute changes.
$100/hr